1968 MG Midget

Talk about your cars etc here. Keep it sort of sensible and on topic please.
SiC
It's S small i C
Posts: 9370
Joined: Sun Apr 28, 2019 8:59 am
Has thanked: 1826 times
Been thanked: 5404 times

Re: 1968 MG Midget

Post by SiC »

I sliced this bit up to bend downwards to try closing the gap up a bit more. 
Image
Image

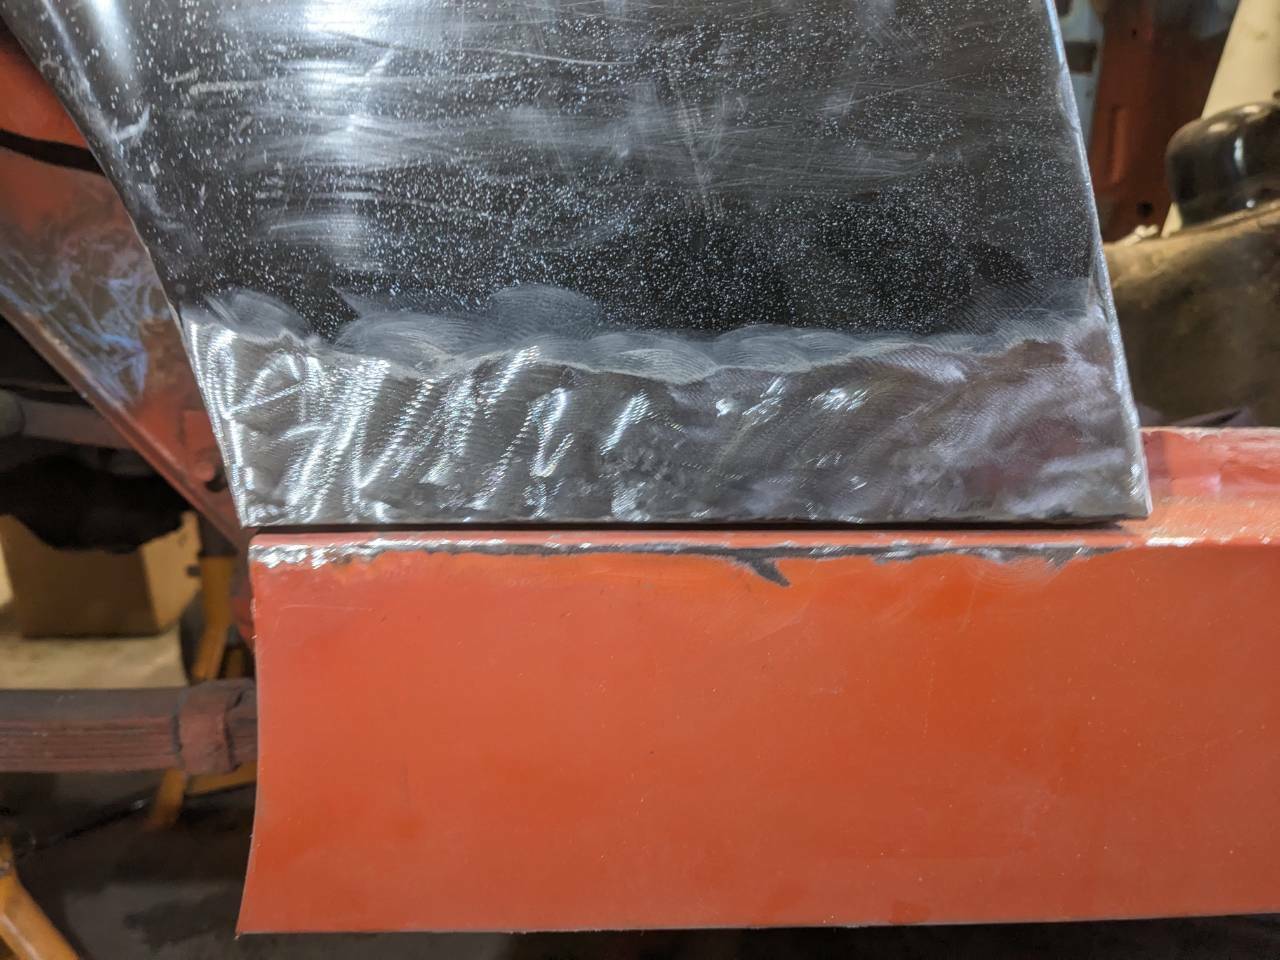
I used a set square steel ruler to set the gap. 
Image

Then welded
Image
Image
 
Gap is definitely smaller but tbh it's still larger than the other side. However at least it's now a consistent gap along the edge.
Image
 
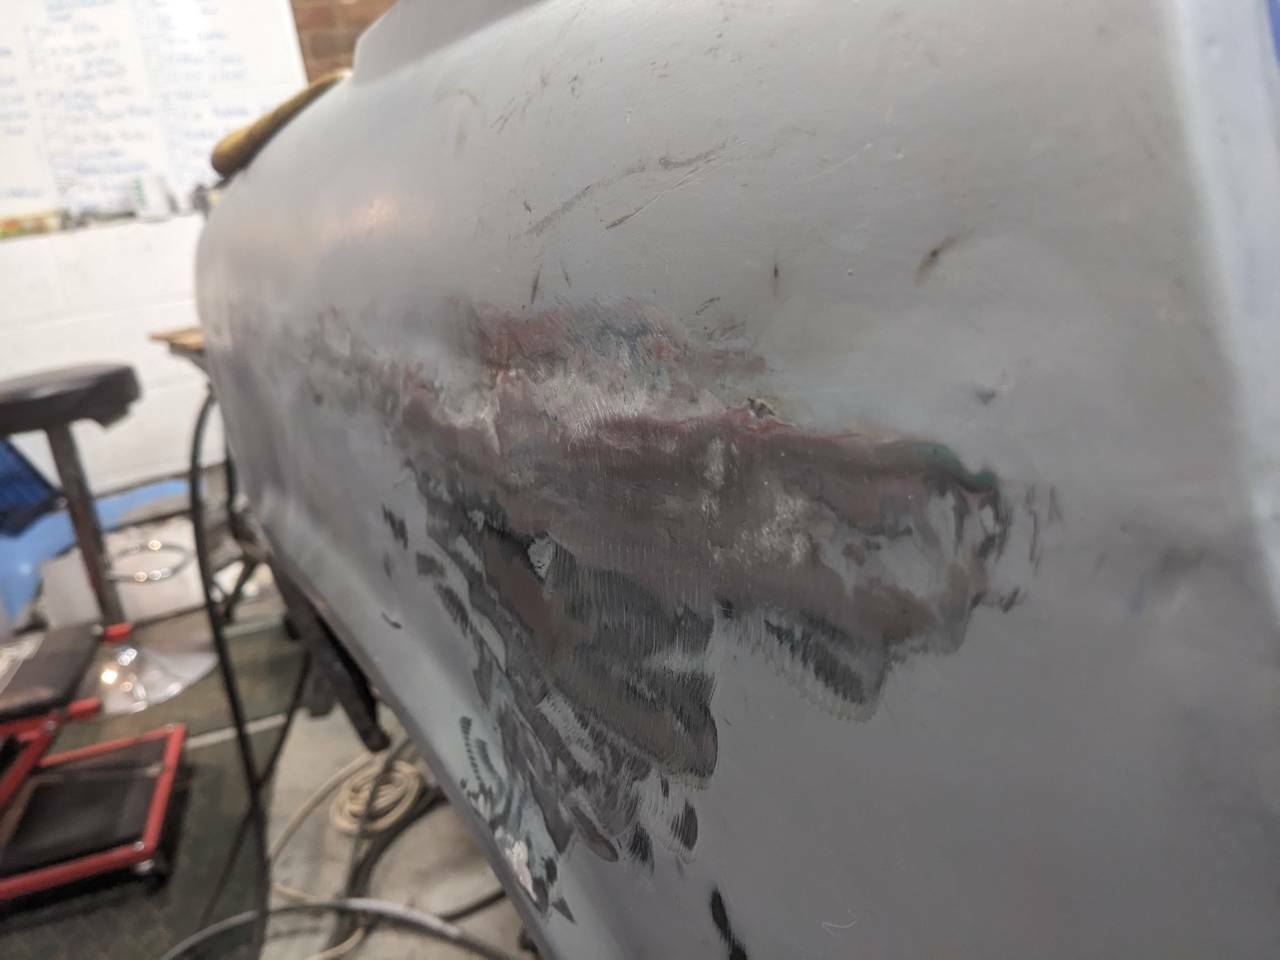
Ground back the welds
Image
 
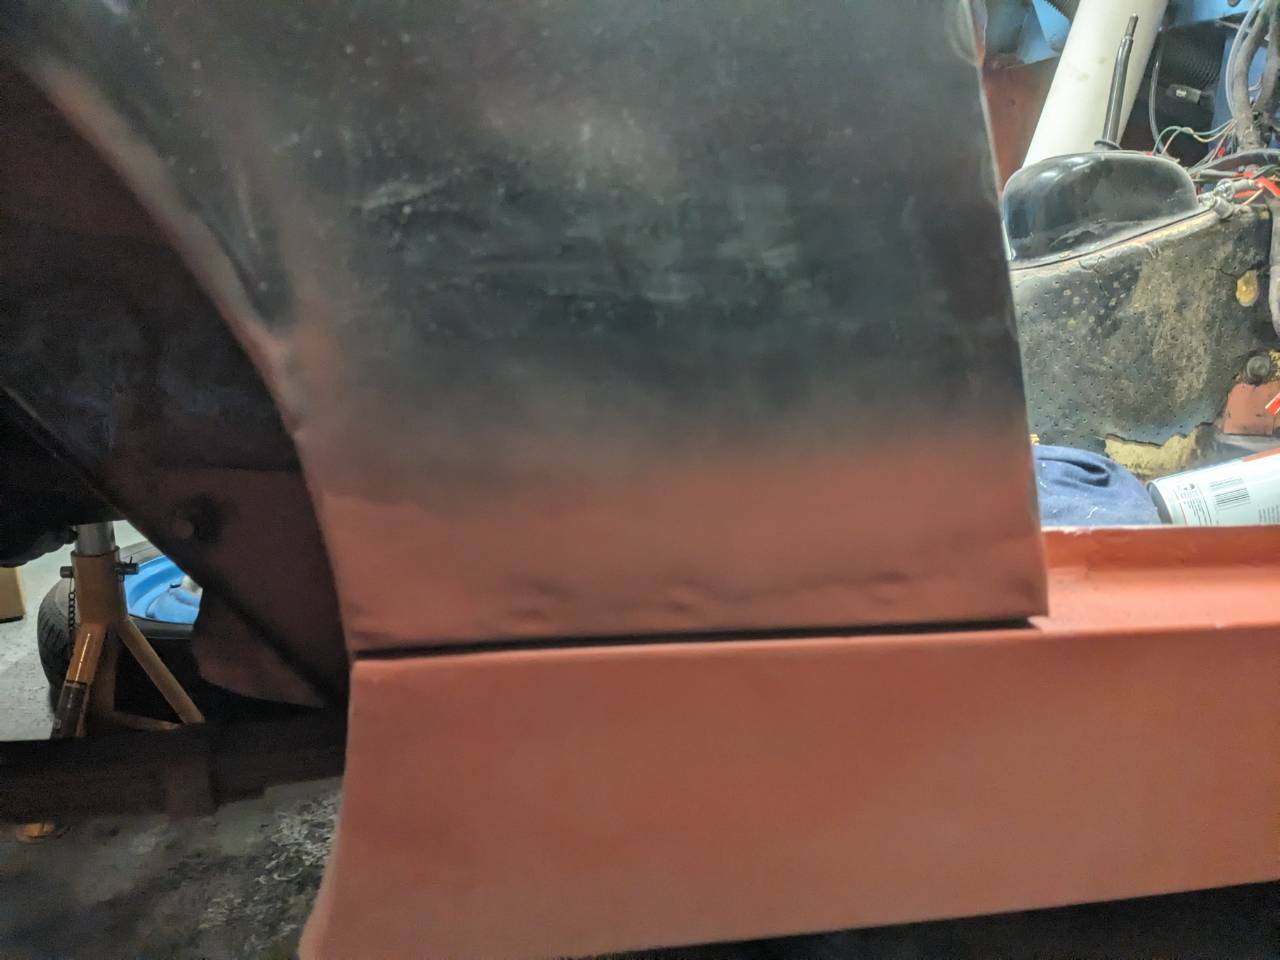
Going to need a skim of filler to finish it off but it's better than it was.
Image
Image
 
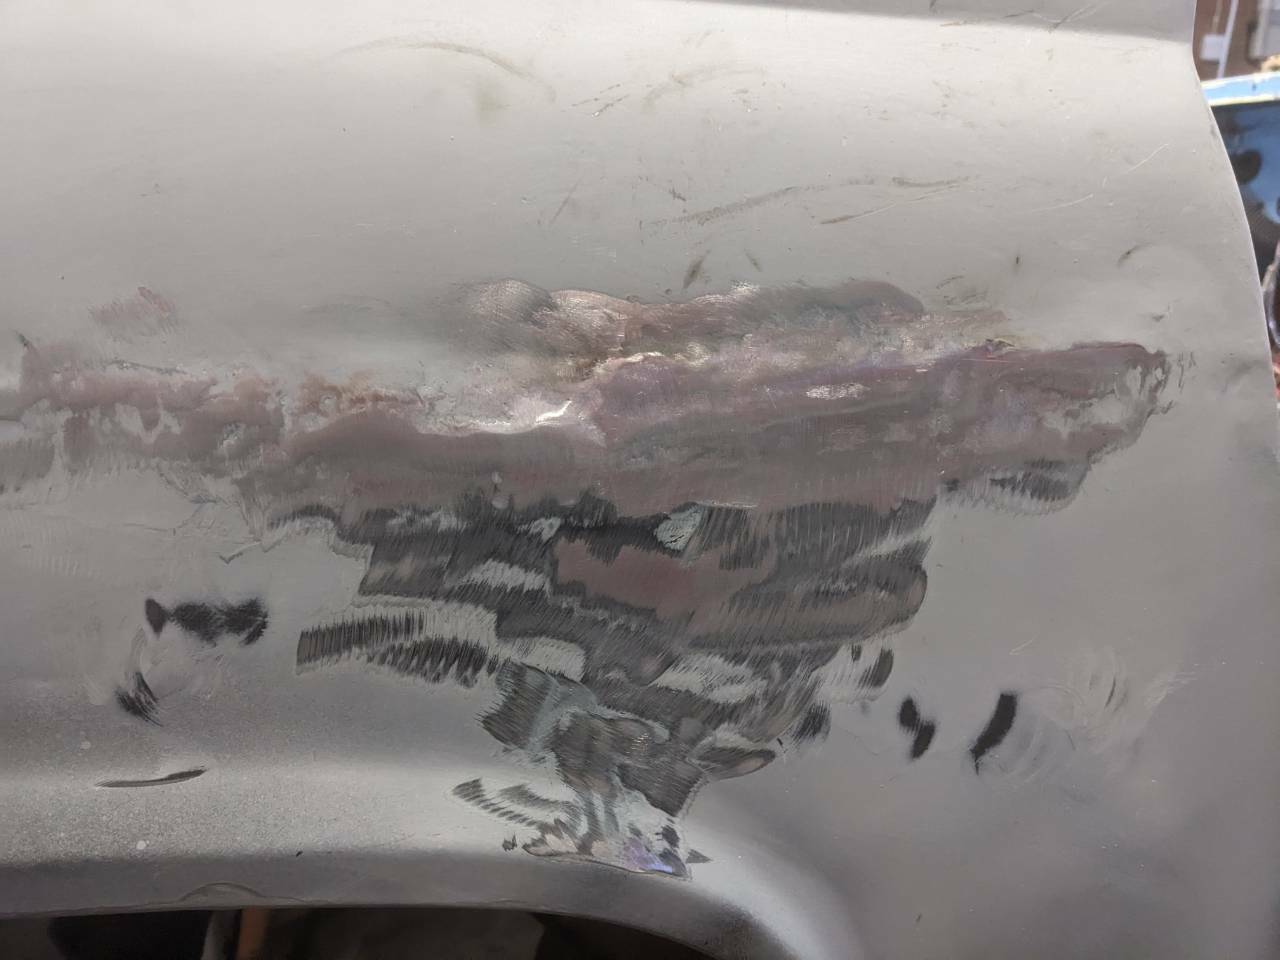
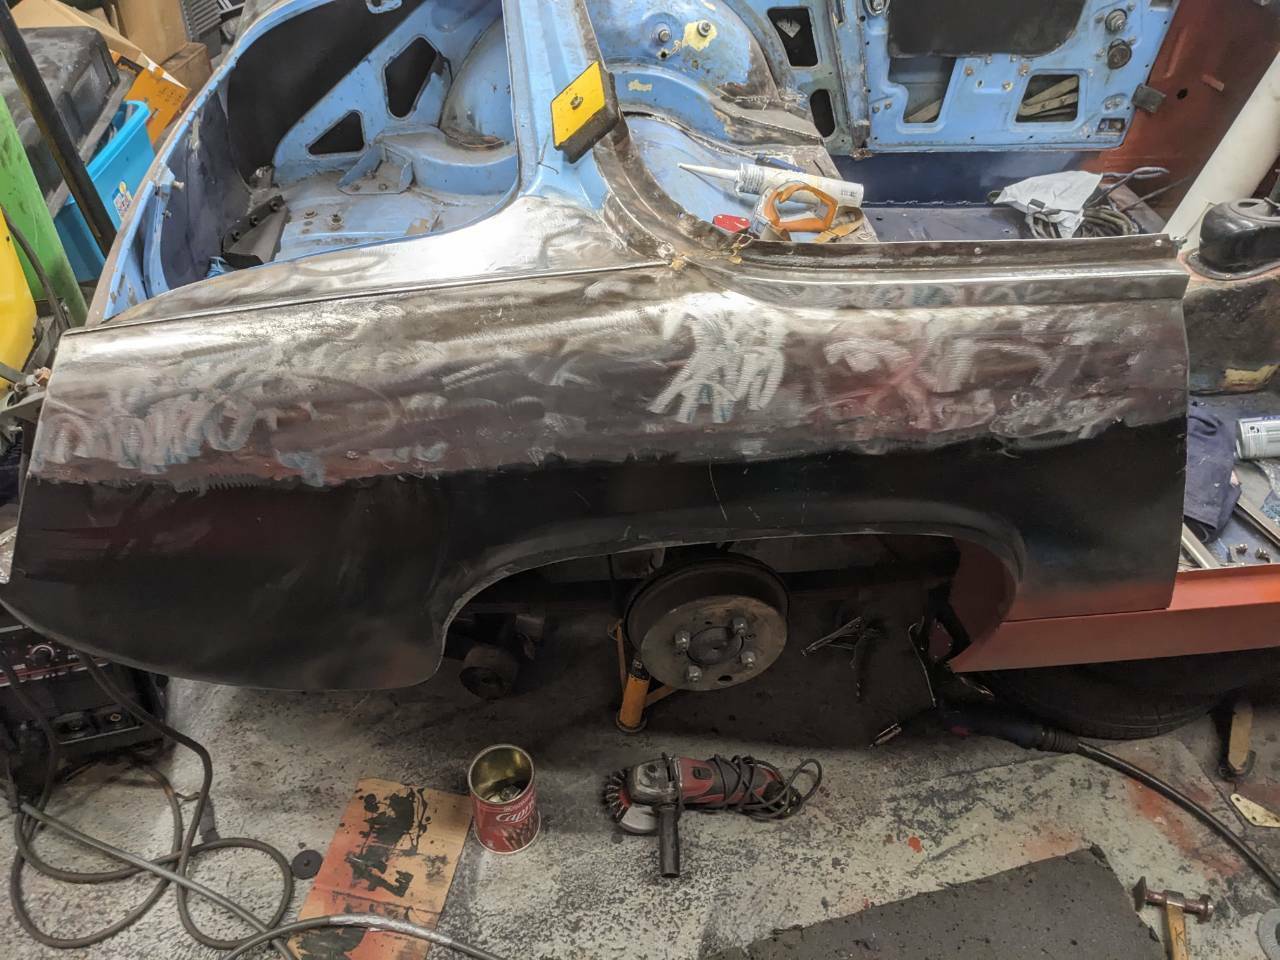
Then set to work welding up the holes on the top section. Blew through the panel a few times and had to patch up the holes. Tried my best but I did end up putting a bit too much heat into it.
Image
Image

The tail end is just about acceptable.
Image
 
But I'm really not happy with the door end. Not quite sure what to do here so I'm very welcome to any suggestions. Worse case I could chop it out and redo with a replacement panel. But that feels a bit drastic. 
Image
Image

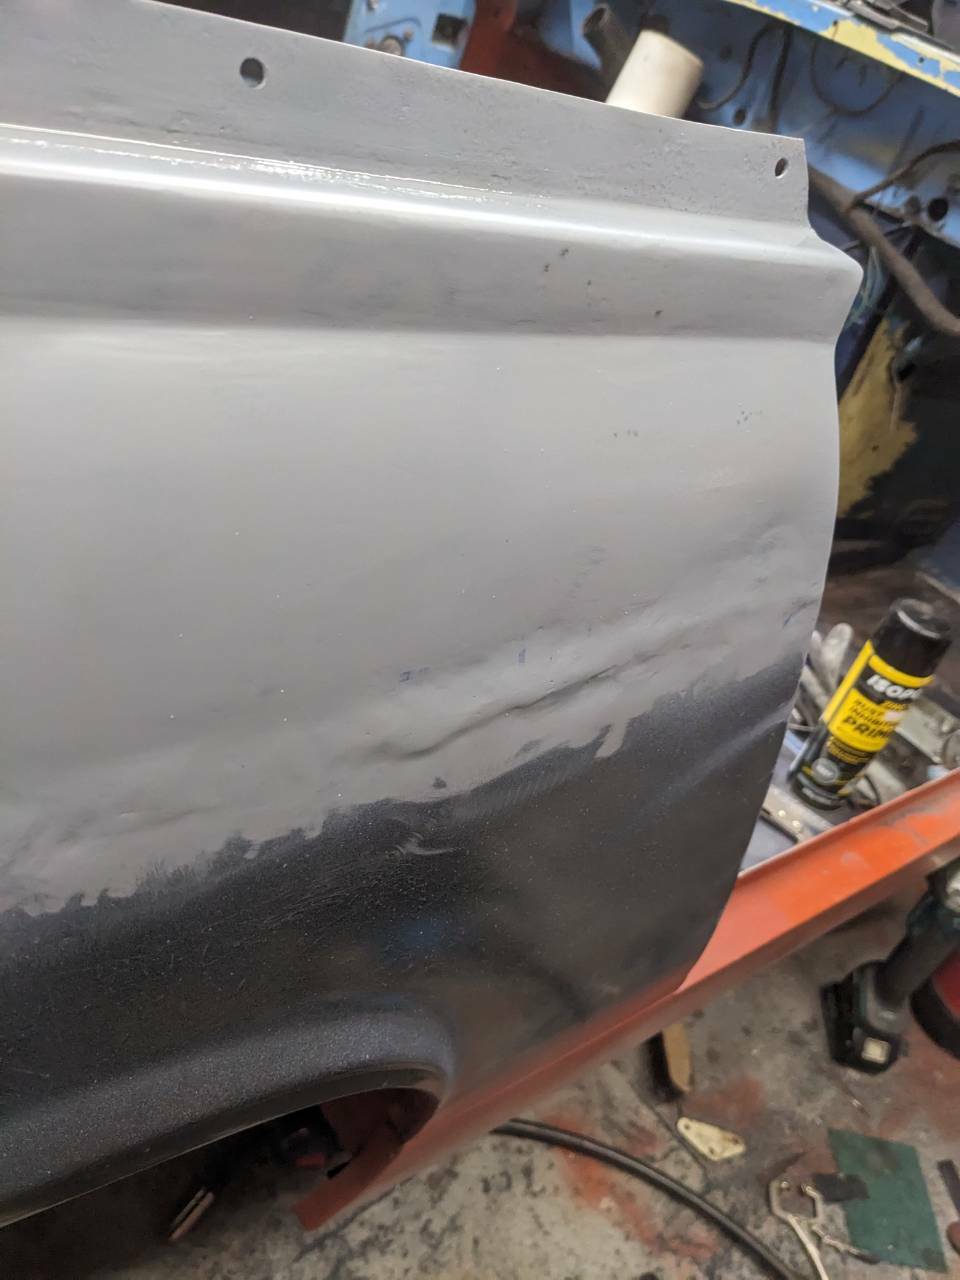
I've tried bashing it into shape but the lump is pretty tough to bend. Once the primer dries, I'm going to get a straight edge on it to see if it could at least be skimmed with filler. 
SiC
It's S small i C
Posts: 9370
Joined: Sun Apr 28, 2019 8:59 am
Has thanked: 1826 times
Been thanked: 5404 times

Re: 1968 MG Midget

Post by SiC »

I've just attacked it with a flat sanding disc. Pretty sure what's happened here is that I put too much heat through initially welding the panel on and warped it. Then sanded flat but that too much off. I rewelded but that made it lumpy. 

Anyway I've got even bigger problems now 🤣🫠

I'll get my copper tongue out and get welding to fill this mess up with fresh welds. 
Attachments
PXL_20240127_211018664.jpg
PXL_20240127_211018664.jpg (408.9 KiB) Viewed 463 times
SiC
It's S small i C
Posts: 9370
Joined: Sun Apr 28, 2019 8:59 am
Has thanked: 1826 times
Been thanked: 5404 times

Re: 1968 MG Midget

Post by SiC »

Redid the left bit which wasn't so bad. Looks lumpy below (which it is) and I can't get much to the back of it to bash it out. But it's below a straight edge, so a skim of filler should sort it.

The right .... well I've made my bed and now I need to sleep in it. 😅
Image

A small patch that hopefully look seamless once finished with filler + paint. At least it's solid. 
User avatar
cuntbuster
Posts: 266
Joined: Sun Dec 11, 2022 11:18 am
Has thanked: 501 times
Been thanked: 99 times

Re: 1968 MG Midget

Post by cuntbuster »

Hate to say it SiC. But I'm not sure how you're going to tidy all that up. Keep pressing ahead with this car though. It would be great to see it all pieced back together and returnd to the road.

Do you still have that Dolomite?
Who you gonna call
SiC
It's S small i C
Posts: 9370
Joined: Sun Apr 28, 2019 8:59 am
Has thanked: 1826 times
Been thanked: 5404 times

Re: 1968 MG Midget

Post by SiC »

cuntbuster wrote: Sat Jan 27, 2024 10:11 pm Hate to say it SiC. But I'm not sure how you're going to tidy all that up. Keep pressing ahead with this car though. It would be great to see it all pieced back together and returnd to the road.
Thinking about it, the chrome trim sits along this line so I may get away with. Tbh there was a ridge previously where the other panel was "welded" over the top with a lip. Then filler hid that lip. I think this bulge is much shallower than that lip. So filler and the chrome piece will hopefully make it look absolutely fine.

Just annoying as the other side is far better. I must have been too impatient and welded too quickly. That cut bit above is actually almost all on the new panel. Which says to me that I put too much heat through. So it bulged and then when I sanded it flat, it simply thinned that metal too much.
cuntbuster wrote: Sat Jan 27, 2024 10:11 pm Do you still have that Dolomite?
Yeah. Funnily enough I was looking at buying some NOS wings that have come up recently.
PXL_20230501_173216665.jpg
PXL_20230501_173216665.jpg (1.05 MiB) Viewed 448 times
PXL_20230501_173204313.jpg
PXL_20230501_173204313.jpg (1023.79 KiB) Viewed 448 times
Let's not talk about how it's been parked here since May last year and that it's £72 per month for it to be sat here.
PXL_20230912_142823760.jpg
PXL_20230912_142823760.jpg (557.8 KiB) Viewed 448 times
PXL_20230912_142830265.jpg
PXL_20230912_142830265.jpg (615.12 KiB) Viewed 448 times
DodgeRover
Posts: 13749
Joined: Sun Apr 14, 2019 11:24 pm
Has thanked: 1824 times
Been thanked: 2709 times

Re: 1968 MG Midget

Post by DodgeRover »

Can you fill it with lead once you've sorted out the thin area. Whatever happens it's going to be better than it was! At least the welds are attached now
User avatar
Eddie Honda
Rainman The Google Fu Master
Posts: 21549
Joined: Tue Apr 09, 2019 10:45 pm
Location: 寄居町
Has thanked: 13440 times
Been thanked: 13262 times

Re: 1968 MG Midget

Post by Eddie Honda »

S02E02-bTJ4qnHW-subtitled.jpg
S02E02-bTJ4qnHW-subtitled.jpg (57.76 KiB) Viewed 433 times
The Reverend Bluejeans
Prize Cunt
Posts: 6324
Joined: Wed Apr 10, 2019 6:31 pm
Location: Big Al Granvia’s armpit.
Has thanked: 718 times
Been thanked: 2337 times

Re: 1968 MG Midget

Post by The Reverend Bluejeans »

Lead is shite. Plastic filler is ideal but that will be a mission to straighten - best left to whoever paints it tbh.
User avatar
PhilA
Posts: 2965
Joined: Thu May 30, 2019 1:24 pm
Location: Larose, LA, USA
Has thanked: 934 times
Been thanked: 6535 times
Contact:

Re: 1968 MG Midget

Post by PhilA »

The factory gaps there are utterly shit and got worse as the tooling wore out. You've made it better than they did new. That gap was just filled heavily and painted.
Pontac Cheepten
Plymmut Furey
Jaaaaag
SiC
It's S small i C
Posts: 9370
Joined: Sun Apr 28, 2019 8:59 am
Has thanked: 1826 times
Been thanked: 5404 times

Re: 1968 MG Midget

Post by SiC »

Still bad but at least it should be fixable with filler now. The chrome strip should also hide anything left. 

Ignore the paint runs. 🤣
Image
Image
Image
Image
Image
Image
Image
 
Post Reply